


Chromebooks exploded in popularity during the pandemic as parents snatched up these affordable laptops for kids now taking classes from their kitchen tables or bedrooms. And while that demand has cooled off in recent quarters, millions of Chromebooks are in circulation, and chances are, there are a few things you don't know about these Chrome OS-based devices. Show
Take screenshots, for instance. As Chromebooks are internet-based laptops, there aren't as many options for third-party screenshot tools as there are for Windows or macOS. Chrome extensions are plentiful, but the quickest way to capture what you see on your screen is to use Chrome OS' built-in tools. Here's how that works. Our Top-Rated ChromebooksTake a Screenshot With the Keyboard Shortcut Lenovo IdeaPad Duet 5 Chromebook (Photo: Molly Flores) Chrome OS has long supported a screenshot keyboard shortcut. On your Chromebook, press the Shift + Ctrl + Show buttons (the Show window looks like a rectangle with two vertical lines next to it). In the menu that appears at the bottom of the screen, select Screenshot. Choose whether you want to take a full-screen screenshot, a partial screenshot, or window screenshot. If you're using an external keyboard that doesn't have the Show button, press Shift + Ctrl + F5 to access the screenshot menu. With the launch(Opens in a new window) of Chrome OS 89 in March 2021, Google added a screen-capture tool to the Quick Settings menu on Chromebooks. Go to Quick Settings on the bottom-right of your screen and select Screen Capture. Double-check that what you want to capture is on your screen. In the tool that appears, choose whether you want to capture the full screen, a single window, or just one part of your screen. Click Capture. (Photo: Google) Where to Find Your Chromebook Screenshots(Photo: Google) Screenshots are automatically copied to your Clipboard. They'll also show up in Tote, which rolled out with Chrome OS 89 and keeps important files at your fingertips. Open Tote from the Shelf to access recent downloads, screen captures, and pinned files. To find them later, screenshots also get saved to your "Downloads" folder. To change where they go, press the Shift + Ctrl + Show windows, select Settings > Select folder, pick the folder you prefer, and future screenshots will be sent there. Given that Chromebooks have limited hard drive space(Opens in a new window), one option is to back up these images to Google Drive, where they will be accessible across devices. First Look: Lenovo's Duet 3 Chromebook Gains a Bigger Display, Smarter Keyboard Like What You're Reading?Sign up for Tips & Tricks newsletter for expert advice to get the most out of your technology. This newsletter may contain advertising, deals, or affiliate links. Subscribing to a newsletter indicates your consent to our Terms of Use and Privacy Policy. You may unsubscribe from the newsletters at any time. Screenshots can be useful for a variety of reasons. For example, you can send copies of error messages to support services, show a friend what your game screen looks like, or save a tweet that you suspect is going to be deleted in a few minutes. Today’s laptops all include ways to take screenshots, and that includes Chromebooks. Chromebooks can be a little confusing for someone coming from another platform, especially because their keyboards are somewhat different than those of Macs or Windows PCs. Some keys present on other laptops are missing while new ones have been added. Luckily, there are two ways to take screenshots on Chromebooks: either by using key combinations or by using the Quick Settings pop-up. Screenshots via Quick Settings
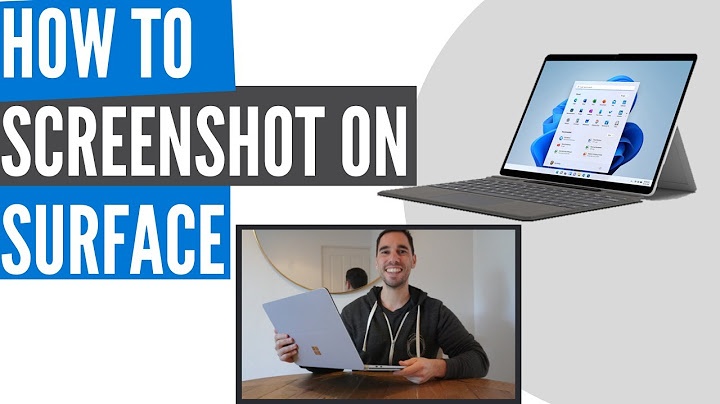
You’ll get a small menu at the bottom of the screen with several icons. From left to right, they’ll include:
The Screen Capture menu gives you several options. Image: Google If you click on the Settings icon, you can adjust your audio input, decide whether your mic should be live, and select the folder that you want to save your screenshots or recordings to. Using the keyboardA faster way to take a screenshot is by using key combinations. To take a screenshot of the entire screen, use the Ctrl + Show windows key combination. The Show windows key, which looks like a rectangle with two lines on the right side, is on the top row of the keyboard. (It’s the equivalent of the F5 key on a PC keyboard.) The “Show windows” key is in the middle of the top row.
Save and edit your screenshotAfter you’ve taken the screenshot, a copy of the screenshot will appear in a pop-out window just above the Quick Settings menu. Click on it to show it in the folder. Any screenshot you take will automatically end up in the Downloads folder — but you can change which folder you want to save it to via the Settings button in the Screen Capture menu. After the screenshot pops up, you can save it, edit it, or delete it.You can also click on the Edit or Delete buttons. The Edit button will take you to a fairly useful app that lets you perform such basic tasks as cropping and rotating, rescaling, annotating, or tweaking the lighting. You get a number of options to edit the screenshot, including rescaling.Update June 3rd, 2022, 9:30AM ET: This article was originally published on January 14th, 2020, and has been updated to account for changes in the OS. How do you take a screenshot on a Chromebook without a Windows button?Take a screenshot. Press Shift + Ctrl + Show windows . Or, if your Chromebook has it, press the Screenshot key .. In the menu at the bottom, select Screenshot .. Select an option: Take a full screen screenshot . Take a partial screenshot . Take a window screenshot .. How do I take a screenshot on my Lenovo Chromebook?Press Ctrl and Shift and the Window Switcher key . How to find screenshots: When the screenshot is successful, a pop-up message will appear above the status area in the lower right taskbar that displays Screenshot taken. After a few seconds, the message will time out and close.
How do you take a screenshot on a Lenovo laptop without the button?How to screenshot on Lenovo if you don't have Windows 10. Press the PrtSc (Print Screen) key on your keyboard to copy an image of your screen to the clipboard.. Open Paint, or a similar application, and use the Paste function to open the image in the program.. How do I screenshot without a Windows key?Position the cursor in one of the corners of the screen, hold the left mouse button and drag the cursor diagonally to the opposite corner of the screen. Release the button to capture the entire screen.
|

How to screenshot on lenovo chromebook without windows key
Related Posts


Copyright © 2024 en.ketajaman Inc.